Freeplay
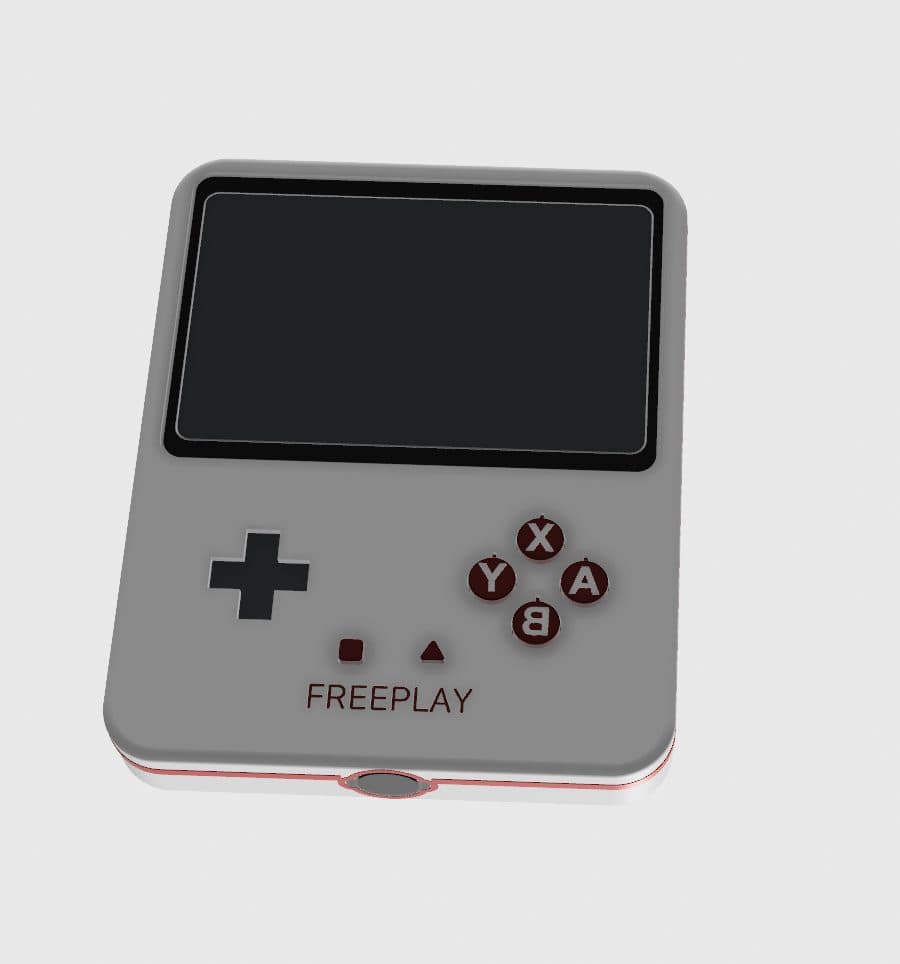
In progressA Game Boy-style retro handheld with a real screen. Every ESP32 handheld I could find runs a 320×240 panel. Freeplay drives a 5-inch 800×480 one from the same class of chip, and the whole project hangs on whether one trick in the display path holds up.
Why It Exists
When you're a kid, the morning is school and then you get recess. Recess is a reset. After the structured learning, the brain hypertrophy, you get to go outside and just play. Let your mind off the leash, take a break, come back re-energised.
As we get older we stop doing that. One way I've always relaxed, and something close to my heart, is video games. Some of my earliest and best childhood memories are playing them with my mom and my brother.
Freeplay is a throwback to that. It's designed to look like a Game Boy, and it'll run pretty much anything up to Super Nintendo and Genesis. It has a much better screen, better buttons and longer battery life, so it's a better experience than the original. It's the same experience, in a more modern build.
There are lots of great handheld projects like this out there, but most of them run on a Raspberry Pi and cost almost as much as a Switch Lite. At that point, just buy the Switch Lite for $200 and call it a day. It's a great option. Freeplay comes in around $60–70, which is a different level of cost. That's what makes it worth building, in a different and bigger form factor.
The ESP32 retro scene is great. It runs on retro-go by ducalex, which does the actual emulation. But every build I looked at (Odroid-Go, Nevolta32, Anemoia) runs a small 320×240 screen. That isn't laziness. There's a hard architectural reason, and I wanted to find out whether it could be engineered around.
The Problem: A Screen With No Memory
Small SPI screens have their own RAM. You push a frame and the panel holds it. Big RGB panels don't. The chip has to stream every pixel out of memory, every refresh, forever.
At 800×480, 16-bit colour and 60Hz, that's 46 MB/s of continuous reads from the S3's external PSRAM. Octal PSRAM realistically gives you 40–60 MB/s. The display alone eats the whole budget before the emulator has read a single byte. This isn't theoretical, either: the board vendor's own issue tracker has reports of corruption and vertical shift from exactly this kind of memory starvation, and the arbiter that decides who gets PSRAM can't be configured.
The Idea: Never Store the Big Frame
An NES frame is 256×240. Blow it up 2× and you have four times the pixels and zero extra information. So don't store the blown-up version. Keep only the native frame in PSRAM (123 KB) and double it on the fly while filling the small buffers that feed the panel.
That cuts PSRAM reads from 46 MB/s to 7.4 MB/s, a 6× reduction. Another way to look at it: the framebuffer is compressed, and the display interrupt is the decompressor.
The catch is that the interrupt has a hard deadline. Miss it and the panel starves, which is the exact failure I'm trying to avoid. So decoding has to be constant-time. Fancy compression like RLE or delta frames would shrink NES backgrounds beautifully, then blow the deadline on the one busy scanline that matters. Pixel doubling is one read, one duplicate, one 32-bit store. No branches, no lookups.
That's also why the panel is 800×480. The size came second. 240 lines doubled is exactly 480, so the picture scales by clean integers with no fractional resampling. The plan is an aspect-correct 640×480 image, with the leftover 160-pixel strip used as a touch rail for pause, menu, save states and brightness. There's also an exact 512×480 pixel-perfect mode for bring-up. One core runs the display fill and nothing else, and the other runs the emulator.
To be clear about novelty: decompressing during scanout is standard embedded graphics practice. What seems to be missing is anyone applying it to emulation on an S3 RGB panel. That's why there's no retro-go RGB port. It isn't impossible. Nobody has done the work yet.
The Hardware
No analog sticks. Nearly everything retro-go can run was designed for a D-pad, so the budget goes into a D-pad with reliable diagonals, plus A/B/X/Y in Nintendo order, Select/Start, and rear index-finger L/R pads.
A real off switch. OFF means the load is actually disconnected, not a sleep state quietly draining the battery in a drawer. Flipping it triggers a short save and unmount, then a hardware cutoff, so a firmware bug can't leave it running. Idle sleep is a separate feature.
The controls took a detour. The first plan was to harvest the D-pad, face buttons and membranes from an Xbox One S controller I picked up for parts. Once it was open, the stack turned out to be married to the Xbox's curved face: different cap heights, sculpted tops, keyed rotations, and a D-pad with its own pivot, carrier and metal retaining ring. I switched to dedicated replacement parts: a D-pad whose integral pivot pin rocks directly on the PCB, and a one-piece ABXY silicone membrane. I printed fit coupons until the clearances passed, then drew two small passive control boards to sit under the membranes. Those are going out for a first-article run now.
The shell. It started as a landscape Switch-Lite-style body. The full-thickness test print felt right in the hand and locked the thumb positions. Then I moved to a vertical Game Boy layout: screen on top, controls below, and one big pack behind the controls forming a grip hump. It's a white PCTG main housing with a removable back, a separately printed candy-red band, and red PETG caps with inlaid legends. The Start and Select caps are a small PlayStation nod, a square and a triangle.
Where It Stands
Parts are ordered and the shell has been through several test prints. The control coupons have passed and the control PCBs are released for fabrication. No firmware is running yet. The scanout trick is a design on paper, not a measured result. The first job when the board is on the bench is proving it.
If it doesn't work, the fallback is fine: the board becomes a wall-mounted home control panel, which is honestly what these boards are best at. Worst case I'm out about $40 and I've learned the S3's memory architecture properly.